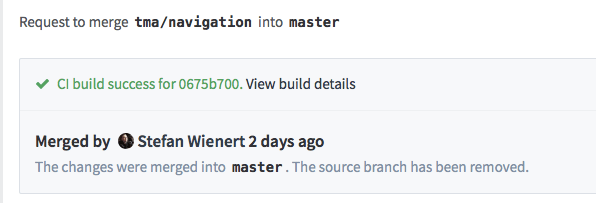
 At pludoni, we are using the self hosted version control web app Gitlab since version 2. Meanwhile, with recent version 8.0 the Gitlab CI got integrated into the Gitlab app. So, integrating the build more into version control was quite intriguing, especially automatic tests of Merge Requests with high visibility right in the webapp.
First, the upgrade with the Gitlab upgrade tool1 was always very smooth (it is marked as deprecated for some versions now, but still works). Also, Gitlab has great upgrade guides for all versions.
Installing Gitlab Multi-Runner + Docker
Upgrade Gitlab to the latest version, if you haven’t yet. If you running an old version, there are a lot of awesome features that Gitlab added in latest major versions:
- Integrated CI, one app for CI + version control
- “Easy” installation with Omnibus packages (We don’t use those at the moment and still using Gitlab from source since the beginning)
- Merge Requests, Issues, Wiki
- Responsive Interface
- http & ssh checkout
- RSS-Feeds, chat integrations such as Slack, Hipchat, Jabber
- LDAP integration (Almost since beginning)
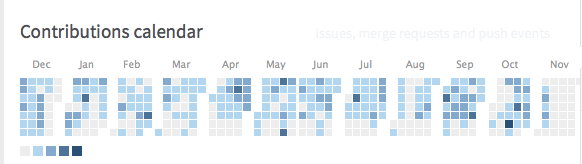
- Statistics, graphs, rendering of README.md, and contributions calendar
- Gitlab also might integrate Mattermost, a chat app, but we don’t use that at the moment

Install both Docker and Gitlab Multi runner on the same host. Gitlab Multi Runner has a great guide for this step2.
Docker Images and Gitlab-runner config
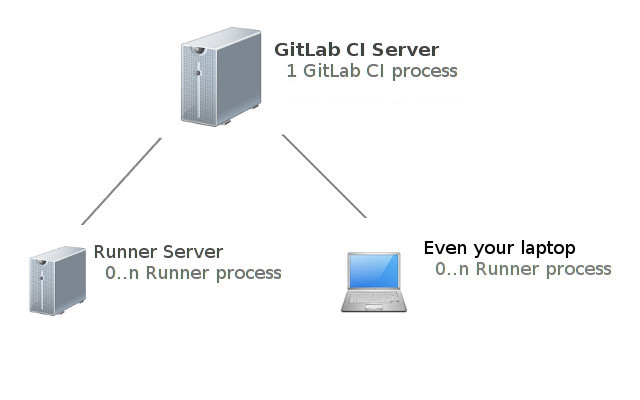 Gitlab provides a management interface for running CI-jobs. Those jobs must be run by “runners” that might or might not been on the same host as Gitlab. Each runner has to install the Gitlab-multi-runner binary and Docker.
Now, we need to build the Docker images that will be used to run our tests and our deployment script. For our company’s projects, we use two different Docker images to separate deployment secrets and concerns:
- Rails base image with Imagemagick, Rmagick, Wkhtmltopdf, Phantomjs, …
At pludoni, we are developing mostly Rails apps that have a similar structure and stack: Ruby on Rails, mostly Postgres, Redis. If you are creating and testing different stacks, creating an image for each stack might be appealing. - a Deployment image (Using Capistrano and Ansible for newer projects)
Rails image
We currently use this Docker image for testing our Rails apps:
FROM ruby:2.1
MAINTAINER Stefan Wienert <stefan.wienert@pludoni.de>
ENV PHANTOMJS_VERSION 1.9.7
RUN echo "# Generate locales" && \
      echo "# Upgrade apt" && \
      sed -i 's/main$/main contrib/g' /etc/apt/sources.list && \
      apt-get update && apt-get upgrade -y && \
      echo "# Install common dev dependencies via apt" && \
        apt-get install -y \
        git curl wget rsync patch build-essential \
        imagemagick libmagickwand-dev libfreetype6-dev libfreetype6 ghostscript libfontconfig \
        openssl libreadline6 libreadline6-dev zlib1g zlib1g-dev libssl-dev libyaml-dev libpq-dev libxml2-dev libxslt-dev libc6-dev \
        postgresql-client \
        libqtwebkit-dev qt4-qmake xvfb bzip2  \
        nodejs \
        ttf-mscorefonts-installer  \
        libssl-dev libxrender-dev wget gdebi && \
      echo "# Phantomjs" && \
        mkdir -p /srv/var && \
        wget -q --no-check-certificate -O /tmp/phantomjs-$PHANTOMJS_VERSION-linux-x86_64.tar.bz2 https://bitbucket.org/ariya/phantomjs/downloads/phantomjs-$PHANTOMJS_VERSION-linux-x86_64.tar.bz2 && \
        tar -xjf /tmp/phantomjs-$PHANTOMJS_VERSION-linux-x86_64.tar.bz2 -C /tmp && \
        rm -f /tmp/phantomjs-$PHANTOMJS_VERSION-linux-x86_64.tar.bz2 && \
        mv /tmp/phantomjs-$PHANTOMJS_VERSION-linux-x86_64/ /srv/var/phantomjs && \
        ln -s /srv/var/phantomjs/bin/phantomjs /usr/bin/phantomjs && \
      ln -s /usr/bin/nodejs /usr/local/bin/node && \
      ln -sf /usr/share/zoneinfo/Europe/Berlin /etc/localtime && \
      echo "WKHTMLtoX" && \
      apt-get install -y xfonts-75dpi && \
      wget http://download.gna.org/wkhtmltopdf/0.12/0.12.2.1/wkhtmltox-0.12.2.1_linux-jessie-amd64.deb -O /srv/var/wkhtmltox.deb && \
      dpkg -i /srv/var/wkhtmltox.deb && \
      apt-get clean

COPY ssh/ /root/.ssh
RUN ssh-keyscan mygitlab.example.com >> ~/.ssh/known_hosts

CMD [ "bash" ]
- We inherit from the Ruby 2.1 image
- Install a bunch of stuff, like Nokogiri requirements, Imagemagick, database clients, NodeJS (asset pipeline/JS specs), html renderer like Phantomjs (for feature specs), Capybara-webkit and Wkhtmltopdf (for generating server side PDFs) and fonts for those.
- Run ssh-keyscan on the Gitlab, so we don’t get a warning with unknown key on deployment
- We add the
sshdirectory that is in the same folder as the Dockerfile. Inside, we have a freshid_rsaandid_rsa.pubthat we also added to the Gitlab interface (as deploy key / specific deploy user).
If your project has no private git gems, you might not need to add a key, Gitlab-Multi-runner will check out the project on deployment via http and it’s private token.
But if you are using private Git-gems, likegem "pludoni_api_client", git: "git@gitlab.example.com:repos.git", you have to add that key You can create one those as:
mkdir ssh
ssh-keygen -f ssh/id_rsa -C "test@myserver"
Add additional libraries that you might need.
Now, build the Docker image:
docker build -t pludoni/rails-base:v1 .
You can check, if it works, by going starting a container with this image and play around:
$ docker run -it pludoni/rails-base:v1 bash
root@4ff46170d45e:/# ruby -v
ruby 2.1.7p400 (2015-08-18 revision 51632) [x86_64-linux]
Deploy image
Similar, we build a deploy image. That might be different for your setup. If you are using Capistrano and have the deployment recipe alongside your app, you might even take the same (or similar) image like the Rails base image. Just make sure you add the deployment SSH key(s).
For us, we are currently using Capistrano for some apps, and Ansible for some others, so we install both on the same image:
FROM ruby:2.1
MAINTAINER Stefan Wienert <stefan.wienert@pludoni.de>

RUN echo "# Generate locales" && \
      echo "# Upgrade apt" && \
      apt-get update && apt-get upgrade -y && \
      apt-get update && \
      echo "# Install common dev dependencies via apt" && \
        apt-get install -y \
        git curl wget rsync patch build-essential  \
        openssl libreadline6 libreadline6-dev zlib1g zlib1g-dev \
        libssl-dev libyaml-dev libpq-dev \
        libxml2-dev libxslt-dev libc6-dev \
        libssl-dev libxrender-dev wget gdebi && \
      apt-get clean

## e.g. Ansible:
# Install Ansible
RUN apt-get install -y python-pip python-dev python-yaml && pip install ansible --upgrade

# Add ssh key for checkout of gitlab
RUN ssh-keyscan git.pludoni.com >> ~/.ssh/known_hosts
RUN ssh-keyscan your-production-host.com >> ~/.ssh/known_hosts
COPY ssh/ /root/.ssh

## clone you Ansible project which defines the deployment
RUN mkdir -p /deploy
RUN git clone git@gitlab.example.com:administrator/ansible-main.git /deploy/ansible
## Install dependencies of the Ansible repository, e.g. Rolefile.yml
RUN ansible-galaxy install -r /deploy/ansible/Rolefile.yml #

# You might also copy a different ssh deploy key into the image:
ENV PRIVATE_KEY /deploy/id_rsa
COPY id_rsa $PRIVATE_KEY
RUN chmod go-x $PRIVATE_KEY

## Copy a custom wrapper script, that you can create alongside the Dockerfile
COPY deploy /usr/local/bin/deploy

CMD [ "bash" ]
In the same folder, create a deploy to simplify the process. Here a starting point
#!/bin/bash

## Ansible
cd /deploy/ansible
git pull origin master

# If you are deploying your ssh deploy key with the ansible, here an idea:
ansible-playbook -i inventory deploy.yml -l $1 -e "rails_app_git_branch=$CI_BUILD_REF" \
  --private-key $PRIVATE_KEY -e ansible_ssh_user=$1
# otherwise, simple call of ansible-playbook
# ansible-playbook -i inventory deploy.yml -l $1 -e "rails_app_git_branch=$CI_BUILD_REF"


## or Capistrano
REVISION=CI_BUILD_REF bundle exec cap deploy
- Gitlab gives us a reference
CI_BUILD_REFof the current commit. It might be a good idea to deploy those ref instead of just “master”, depending on your branching/merging workflow. Here is a list with all available environment variables - As we deploy a lot of similar apps, I use a command line argument to determine which host to deploy and pass those to the Ansible playbook.
Built that image, too:
docker build -t pludoni/deploy:v1 .

# Test it
docker run -it pludoni/deploy:v1 bash
root@4ff46170d45e:/# deploy myapp
...
Gitlab runner config
Gitlab Runner created a config file on installation. You can edit this, to restrict Docker usage to specific repositories and link services that you use all the time:
# /etc/gitlab-runner/config.toml
concurrent = 1

[[runners]]
  url = "http://yourgitlab.example.com/ci"
  token = "secret_token"
  name = "hostname.host"
  executor = "docker"
  [runners.docker]
    image = "pludoni/rails-base:v1"
    privileged = false
    volumes = ["/cache"]
    allowed_images = ["*", "*/*", "*/*/*"]
    allowed_services = ["*", "*/*"]
    extra_hosts = ["some_dns:12.34.56.78"]
    services = ["postgres:9.4", "redis:latest"]
Here, we:
- specified a base image,
pludoni/rails-base:v1 - added a static DNS entry, as Docker does not allow to modify
/etc/hosts, if you have special requirements - Link the PostgreSQL and Redis containers by default, so each deploy will have those available
Gitlab has great docs on the Runner config + Docker image3.
Gitlab-CI.yml
Now, you need to enable CI for all your projects that you want to test that way. First, enable shared runner in Gitlab CI for each project. Second, add a .gitlab-ci.yml4 the project’s folders.
Here an example from on of our apps:
---
image: pludoni/rails-base:v1

# Docker images to link, not necessary if you specified those in
# /etc/gitlab-runner/config.toml
services:
	- "postgres:9.4"
  - "redis:latest"

stages:
  - test
  - checks
  - deploy

rspec:
  script:
    - gem install bundler
    - bundle install --jobs $(nproc) --path=/cache/bundler
    - cp config/database.yml.gitlab config/database.yml
    - bundle exec rake db:create RAILS_ENV=test
    - bundle exec rake db:schema:load RAILS_ENV=test
    - "rspec -f d --color --tty"
  stage: test

bundle_audit:
  stage: checks
  script: |
    gem install bundler-audit
    bundle-audit update
    bundle-audit check

deploy:
  image: pludoni/deploy:v1
  script: deploy myapp
  stage: deploy
  only:
    - master
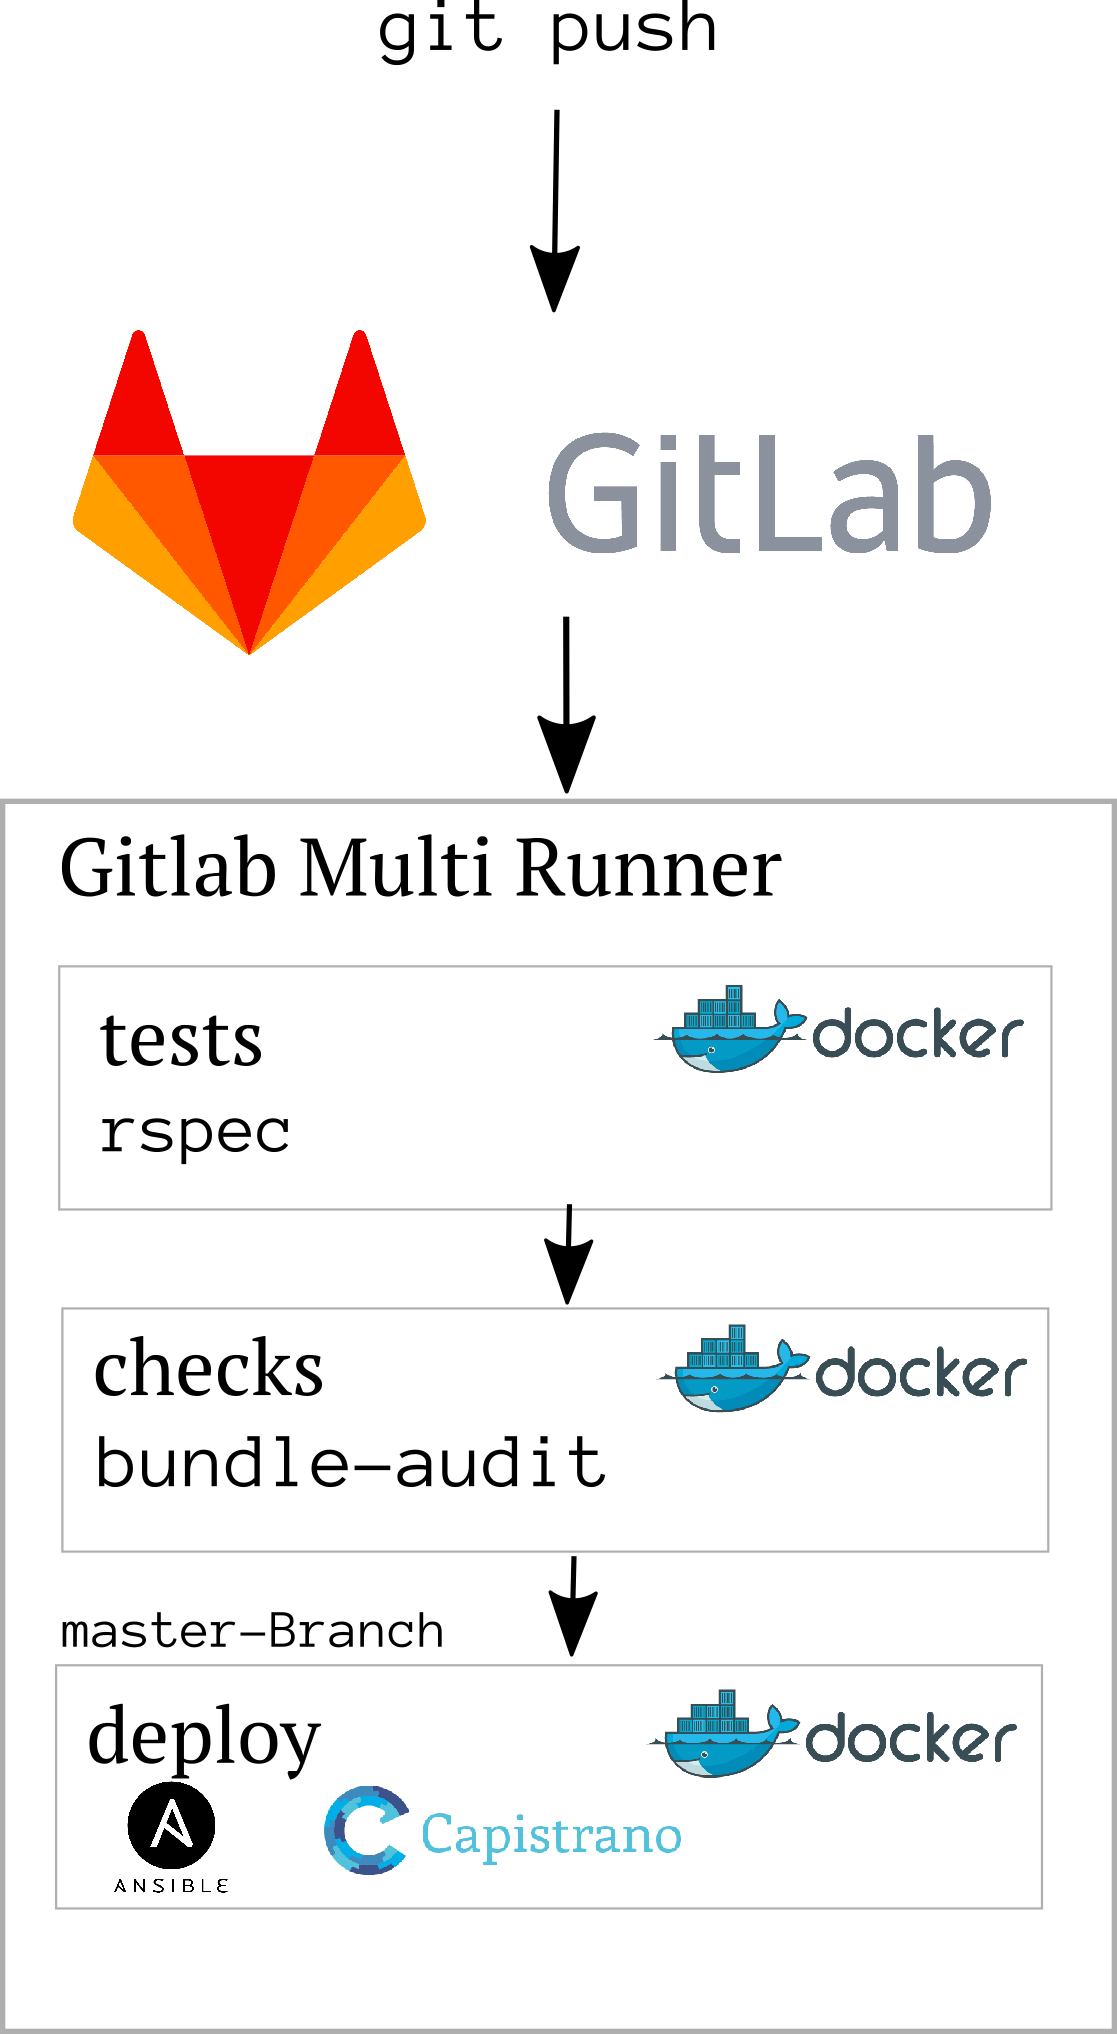 With this build file, we define 3 stages that are run after each other, each stage consists of only 1 tasks. The execution stops, if one task fails (one commands exists with exit code > 0)
You can specify more than one task per stage. Very helpful to parallelize things, e.g. frontend specs, code style violation checks, or archive of build artifacts, like reports.
- The first two stages use our predefined base-image, the deploy task uses the deploy-image
- The deploy task is only run on master builds, the other two on all push/merge events
- The RSpec task installs the Gem into a cache folder that Gitlab provides. This makes our consecutive test runs much faster, as the Gems are only installed once.
- Bundle audit checks our app for known security issues in dependencies

We also define a config/database.yml.gitlab in each project, that uses the environment variables for database connection that we have to use, e.g.:
test:
  adapter: postgresql
  pool: 5
  timeout: 5000
  host: postgres
  database: mydbname
  user: postgres
The same goes for other databases, like Redis, for example when using Redis as cache store for Geocode you need to modify your Redis initializers:
# config/initializers/geocode.rb
Geocoder::Configuration.cache =
  if ENV['REDIS_PORT_6379_TCP_PORT']
    Redis.new(:host => ENV['REDIS_PORT_6379_TCP_ADDR'], :port => ENV['REDIS_PORT_6379_TCP_PORT'], :db => 0)
  else
    Redis.new
  end

# or Message Bus:
if ENV['REDIS_PORT_6379_TCP_PORT']
  MessageBus.redis_config = { url: "redis://#{ENV['REDIS_PORT_6379_TCP_ADDR']}:#{ENV['REDIS_PORT_6379_TCP_PORT']}/0" }
else
  MessageBus.redis_config = { url: "redis://localhost:6379/0" }
end
Debugging builds
Sometimes the build fails for no apparent reason. To simulate the build, you have to create a Docker setup:
FROM pludoni/rails-base:v1

RUN mkdir -p /build

# might want to install vim or so
RUN apt-get install -y vim
RUN wget https://raw.githubusercontent.com/tpope/vim-sensible/master/plugin/sensible.vim -O /root/.vimrc

COPY setup.sh /usr/local/bin/setup_project
RUN git clone git@gitlab.example.com:apps/app.git /build/app
As you can see, I inherit from our base image, add Vim, and checkout the repository that we want to debug. I also integrate a setup.sh that just do the boilerplate setup that we do in the RSpec build step:
#!/bin/bash
bundle install --jobs $(nproc) --path=/cache/bundler
cp config/database.yml.gitlab config/database.yml
bundle exec rake db:create RAILS_ENV=test
bundle exec rake db:schema:load RAILS_ENV=test
Now, you have run that container and all containers that you want to link. Because this is a little cumbersome, I created another file, run.sh:
#!/bin/bash

# create containers based on the images
docker run -d --name=service-postgres postgres:9.4
docker run -d --name=service-redis redis:latest
docker run -e 'MYSQL_ALLOW_EMPTY_PASSWORD=yes' -d --name=service-mysql mysql:5.5
#docker run -d --name=service-elasticsearch pludoni/elasticsearch:v1

# start those containers
docker start service-postgres
docker start service-redis
docker start service-mysql
#docker start service-elasticsearch

# run a glorified docker command to link all those pieces together
docker run -i -t --link service-mysql:mysql \
  -v $PWD/cache:/cache \
  --link service-postgres:postgres \
  #--link service-elasticsearch:pludoni__elasticsearch \
  --link service-redis:redis \
  pludoni/debug:v1 /bin/bash
Now you are in your build env, and can run individual test files, modifying those, etc.
Conclusion
The new setup works like a charm! The direct integration into the version control is great and we could scrap our Jenkins server. On a side-note, Gitlab’s design is a pleasure, especially compared with Jenkin’s. If you haven’t tried Gitlab as Your on-premise version control, I strongly suggest, you give it a try!
The only feature we miss so far, is the automatic archiving of build artifacts, like SimpleCov HTML report or Code Metrics (achieved by the HTML Publisher Plugin5)
Some general hints:
- different default timezone: Docker container usually run in UTC timezone, some of our tests expected CET timezones. Make sure, to always use
Time.zone.parseandTime.zone.nowinstead of the normal one. /etc/hostsandresolv.conffiles can’t be written by a Dockerfile. So if you have a custom DNS setup, you must specify that as variables for the Runner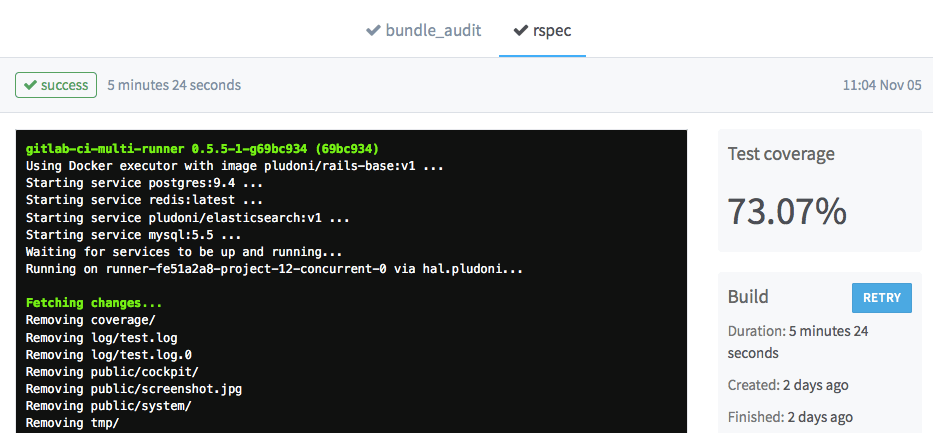
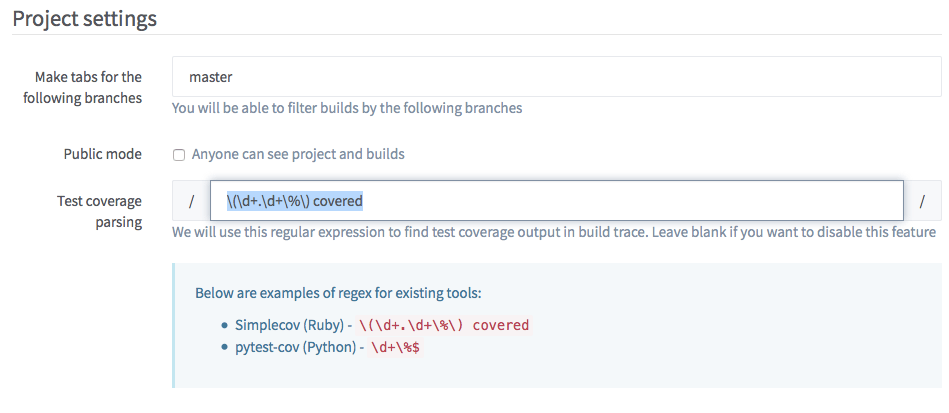
- Include the
simple_covinto your test/spec workflow. Gitlab can parse the output and remember the test coverage. At the moment (v.8.1) there is not much more that you can do with it, but maybe in the future, Gitlab will chart those. To enable the parsing, you need to add the suggested regex on the (CI)-Settings page of the project.
Happy hacking!