As a passionate cyclist and tinkerer, I’m always looking for ways to improve my road bike’s performance and make it more comfortable to ride. Recently, I decided to tackle the challenge of retrofitting my bike with a Shimano DI2 electrical shifting system and hydraulic disc brakes. While I’m no expert, I’m excited to share my experience with this process and discuss the benefits and challenges that come with upgrading a bike’s components. Whether you’re a seasoned cyclist or simply curious about bike modifications, I hope you’ll find this post helpful and informative.
Motivation
In a previous blog post, I wrote about building my current road bike (all terrain style). At that point, I’d chosen the Sensah Empire Pro 2x11 gear with a Z-Race hydraulic cable-actuated brake. At that time, the choice of using a cable-actuated brake was ok, as I had already a lot of new tech to handle (full bike build, tubeless setup). After more than one year, the experience in total was quite satisfying but, compared to my Canyon Grail, which has a hydraulic GRX, the shifting and brake performance was noticeably worse. So I began searching the online bike part stores for groupsets with hydraulic. But, even “entry” sets of hydraulic drop-bar groupsets are expensive, around 700-900 EUR. At the same time, I came across a very good offer for the new Shimano 105 DI2, for 1150 EUR, which was a fantastic deal. Interested in trying out the electrical shifting experience, I pulled the trigger and bought the full group set.
Prerequisites for DI2 - Check your frame has a hole or bottom hole
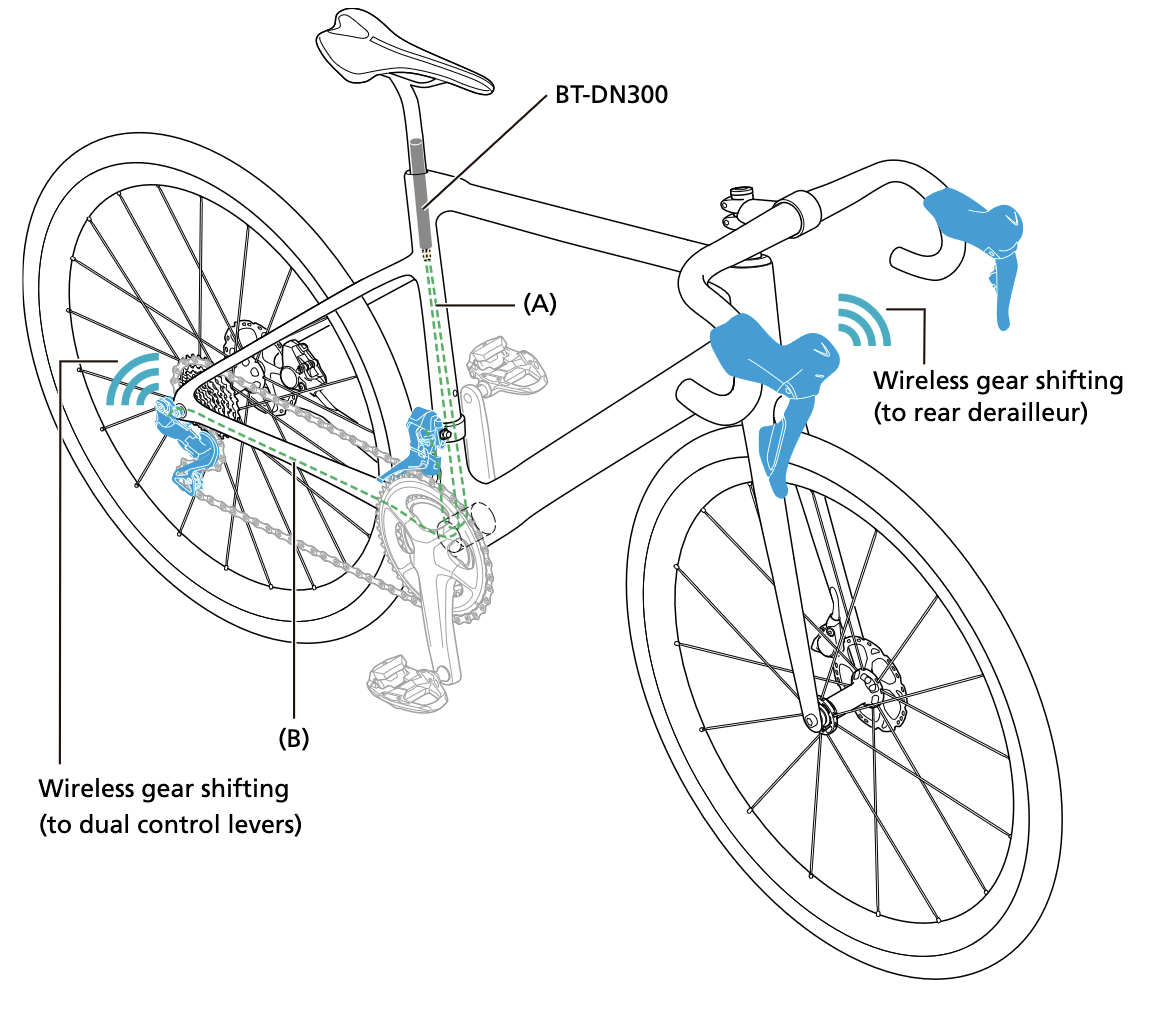
Compared to the previous Ultegra/Dura-Ace DI2, the new 105 DI2 needs less “stuff” (Junction Boxes etc.). You only get the battery, which connects to both derailleurs. So, you don’t need special openings or boxes for other parts. The only prerequisite for the frame is:
a.) a hole in the frame for the rear derailleur cable (near the seat tube bottle cage) b.) or a bottom hole for the rear derailleur cable, and a full cable routing from the seat-post to the rear derailleur.
Of course, for hydraulic brakes, you need a frame which large enough holes to fit the hoses and the normal Center Mount brake callipers.
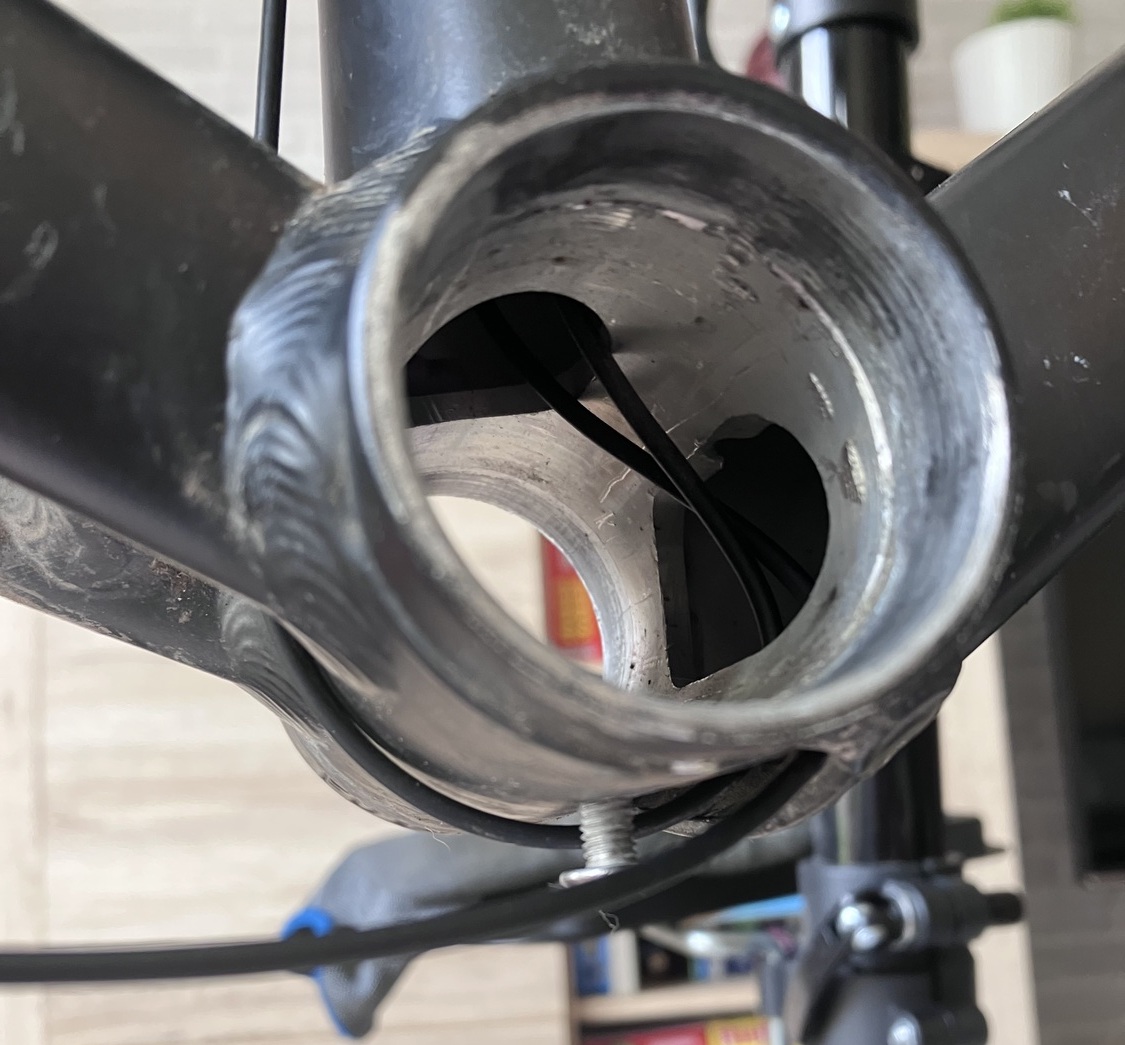
In my case, I have an aluminium frame from Mossos, which by default has no extra hole, but I have an opening at the down tube (See the picture). Before buying the case, I wasn’t sure, if the electrical cable would be long enough, but more about this later.
The parts
I bought the groupset from bike-discount.de for about 1150 EUR, which includes almost everything needed. Additionally, I bought:
- A bleeding kit for the hydraulic brakes (36 EUR) Link
- Shimano Mineral oil (12 EUR)
- Olives and Barbs for the hydraulic hoses - BH90 compatible (10 EUR) Amazon Aliexpress Affiliate
- Because my seat post diameter is 31,4, I tried ordering a seat post adapter, but the Amazon seller sent the wrong size, so I build some bodge myself. Otherwise, this model from Ritchey might be ok (10 EUR)
- Internal routing kit - Aliexpress Affiliate (4 EUR), very handy.
Tools, I already possessed before, but are needed:
- Wire cutter, to cut the hoses to length - Next time I would try this model from Aliexpress.
- If you have a pressfit bottom bracket, you probably need to remove it, to work with the electric cables. For me, cheapish tools from Ali like this installation tool and this removal tool (Affiliate link) worked well enough.
- And the usual tools for installing bike stuff: hex keys, cassette lockring tool, etc.
The installation
DI2 installation
First, I tried out the electrical installation, because I wasn’t sure, the cable would fit. But as you can see, my frame has a hole in the down tube, so I could easily route the cable from the seat post, through the down tube exit up to the derailleur and back to the rear derailleur.
Instructions used:
- Shimano Ultegra Di2 12 Speed Upgrade Project: Installation // Part II
- Shimano ROAD Di2 Series General Guide
Pairing and updating
Next, I downloaded the Shimano E-Tube App and paired the battery with the app. After that, I updated the firmware of the battery and the derailleurs and the brifters. Using the app through Bluetooth was relatively painless, only a little slow the app. Nevertheless worked without any issues. After that, I could already move the derailleurs with the brifters.
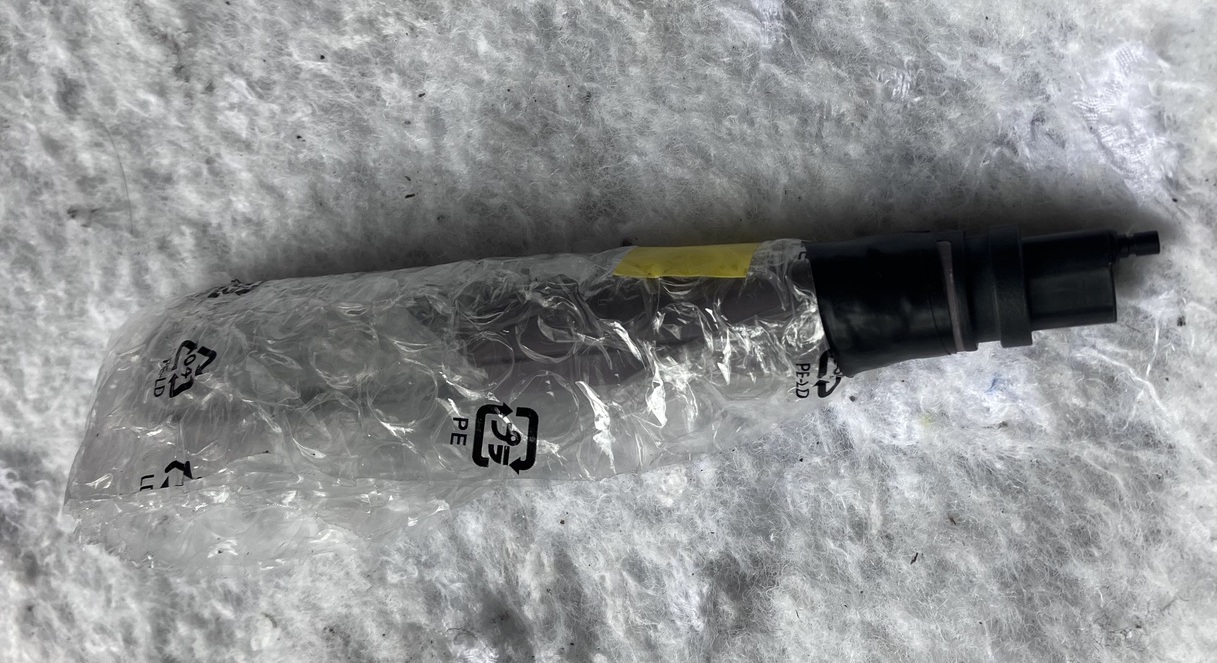
Issue: Seat post battery “mount”
After unpacking the Shimano stuff, I figured the default battery mount does not fit my rather large 31.4mm seat post. So I tried ordering a Ritchey mount from an Amazon seller (No Ali or another shop because of shipping time/cost), but it was the wrong size (27mm again), so I decided to just use some bubble wrap with gaffer tape for the time being :D - No problems so far.
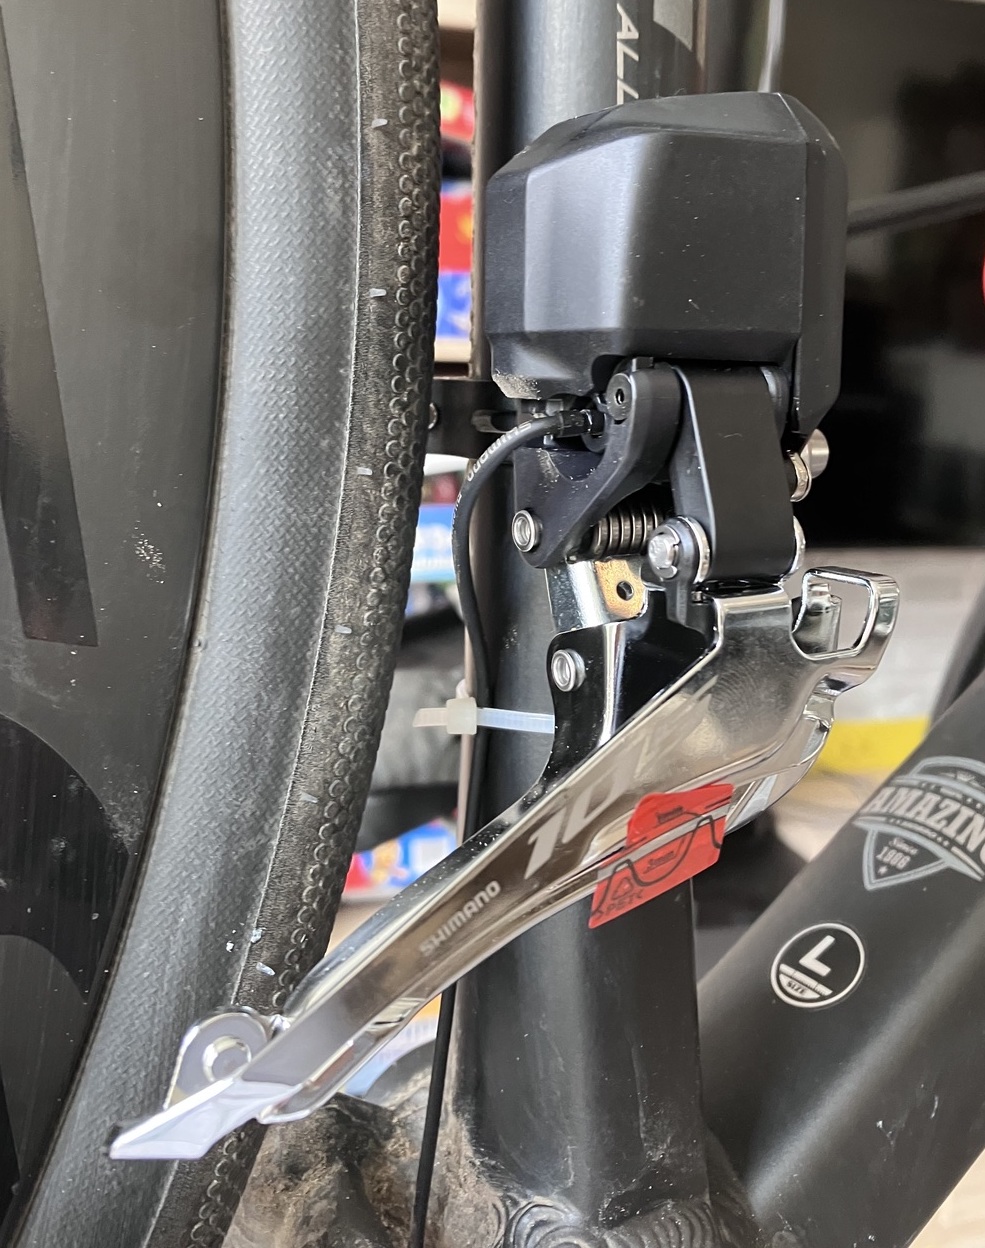
Issue: No hole for front derailleur cable - Zip-tie down-tube routing
Because my frame is not prepared for DI2, I had to route the front derailleur cable through the down tube. I used a zip tie to secure the cable to the down tube. Maybe next time I will use a zip tie in the frame colour :D.
Hydraulic installation
Routing and shortening
The internal routing kit was very handy, again. The hoses came pre-attached to the callipers, but I had to release the rear derailleur because my frame’s entry point was too small to fiddle the hose from the bottom to the exit. So I unwrenched the hose, then turned it around and could route it from the top. Then, cutting the hoses to length was the next step. Most guides and videos use a proprietary Shimano tool, but I used a wire cutter to cut it, and metal pliers to hammer the new barb inside, which worked fine.
Instructions used:
- Shane Miller’s instructions on shortening hoses
- GCN: Swap hydraulic hoses
- Shimano dealer’s manual Hydraulic Disc Brake
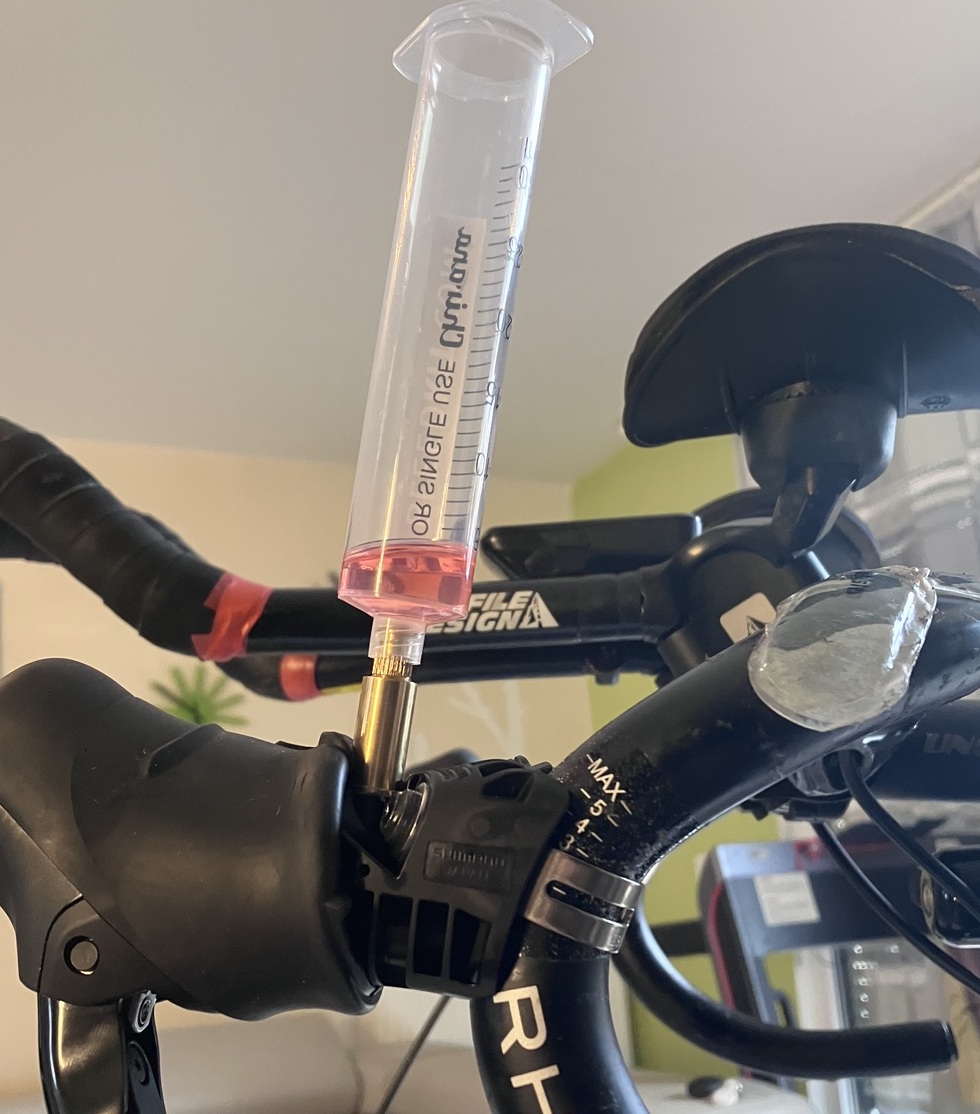
Bleeding
This was my first installation of hydraulic brakes, so I took a lot of time watching videos of other riders doing it. The problem is, that most videos are Mountain-Bike specific, and some brakes have different procedures. Also, the hose entries and nuts are sometimes quite different. At first, a looked for like 5-10min to figure out, this Shimano 105 has two covers on each calliper: One for the bleeding port, and one for the release nut. I used a bike stand and towels, to catch the oil that sprinkled around when cutting the hoses. In the end, I used instructions from:
Instructions used:
- Bleed-Kits installation instructions Youtube
- Shimano’s instructions from above.
The front brake bleeding went great and without any issues. On the rear brake though, I had the problem that the oil would not flow through the hose. I tried cutting the hose, remounting it, and just bleeding into the open rear derailleur. Also, I reset the pistons using a tire lever. That last one or any of the former fixed the blockage, and I could bleed the rest.
Finishing touches
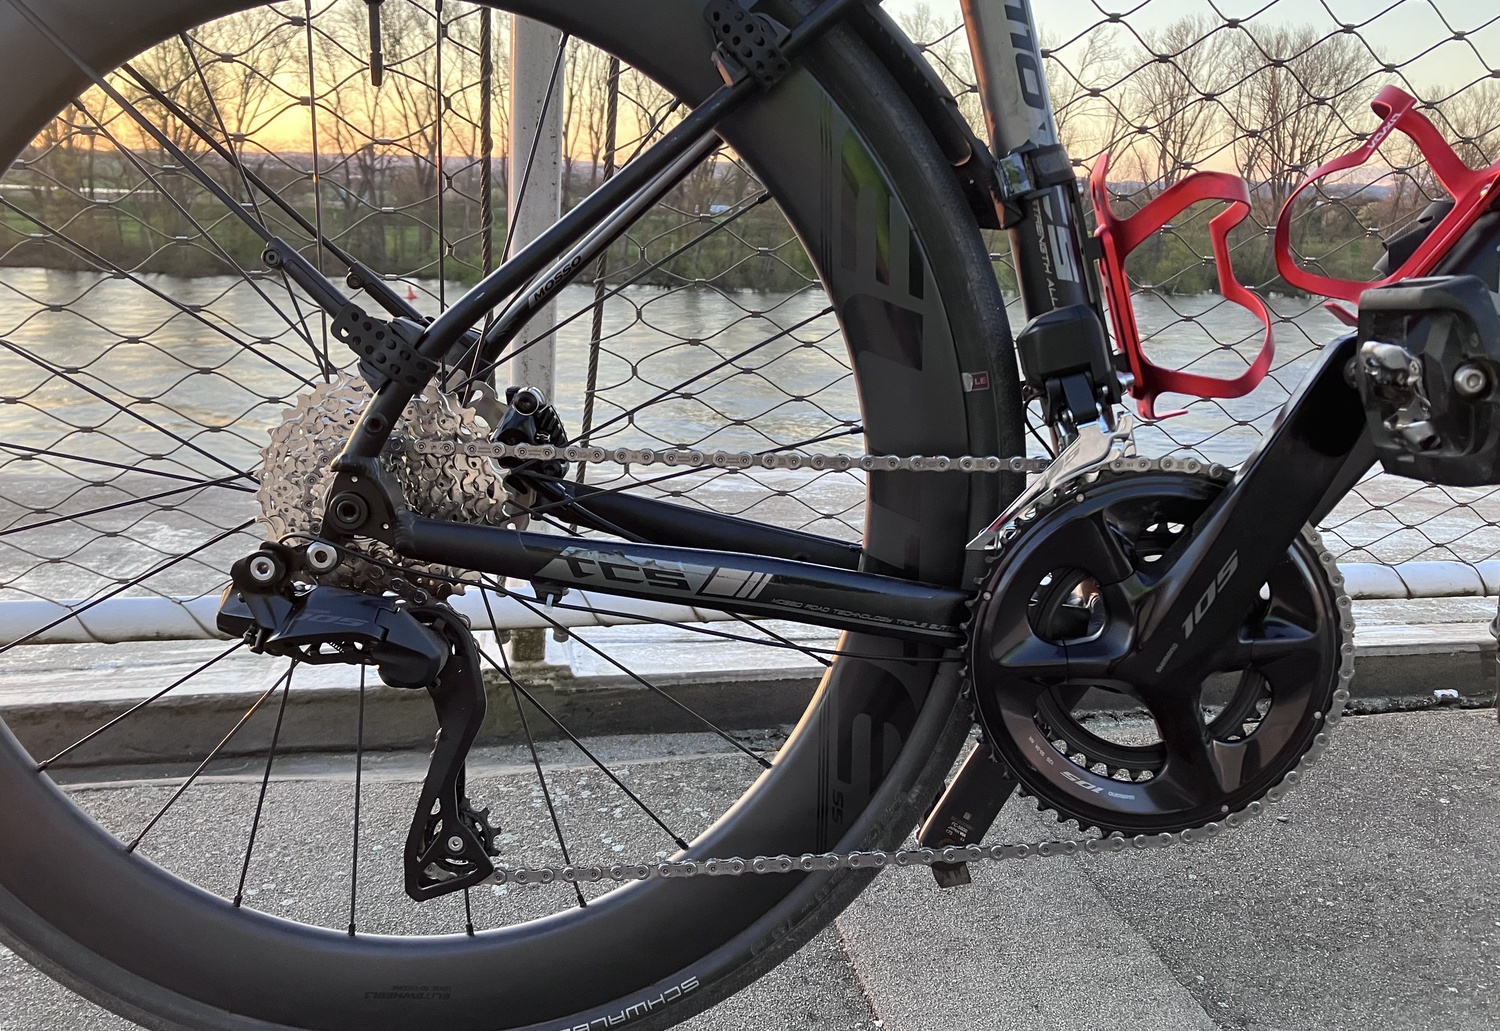
After reassembling the bike - Bottom bracket, bar tape, the installation of Disc rotors, Cassette, Chain, and Crankset was pretty standard, also aligning the disc brake callipers.
Now, the fun part. By using the app, I can set the derailleurs easily, just follow the instructions from the app and adjust using buttons on the app.
Final thoughts
I hurried to get the bike ready to take it to our Eastern vacation. During that time, I already rode about 200km with the new setup. What can I say: the shifting is really nice, not game-changing (especially compared to quality groupsets like GRX), but very swift and easy. After about 2h I was adjusted to the shifting and also enabled the semi-automatic shifting. That means, it will automatically shift the front derailleur and perform correction shifts on the back when you reach the 2nd or 3rd outer-most sprocket. Because shifting is much easier, especially compared to the Sensah Empire, I now feel I shift much more frequently. And of course, a fully hydraulic disc brake is another great upgrade from the Zrace hybrid setup before.
In the end, a “nice” upgrade - Do you need it? Probably not, but if you get a good deal, I would say the Shimano 105 DI2 is well worth the price, especially when even Aliexpress hydraulic group sets (Crank+Brake+Shifters) set you at more than half the price already. Also, the installation procedure seems to be easier than the former DI2 models. No junction boxes are needed, no extra Bluetooth etc. Everything just worked via Bluetooth and App pairing.