Shadowsocks is a Proxy/VPN protocol and collection of of compatible OpenSource client and server software programs. It was first conceived by Github user clowwindy, who had to take parts of the software down because he got visited by the local police. Fortunately, this software is available again and was continued by the community. It works similar like SOCKS5 but uses (better) encryption and (optional) session passphrases to avoid Known Plaintext Attack.
In comparison to commercial VPN/Proxy offers, you or someone you trust need command line access to a server outside the restricted area. To forward the traffic into the Free Internet™ you need to run one of the server software on your machine.
If you are already in the restricted area you might be unable to access the Shadowsocks website (and/or Google Play store). Fortunately, Github access as possible for me at this point. This is why I’ve included some direct download URLs below.
Installation on Server (Go binary)
I used the Go server program, as it doesn’t need any other prerequisites or libraries on the machine and can run standalone. Besides, it offers the unique feature of running on multiple ports at the same time with different passwords, making it easier to share access with other people.
You can find prebuild binaries for direct download here: https://dl.chenyufei.info/shadowsocks/ Other option would be compiling by using Go get and written in the README. I show here the direct download, as it is the easiest and don’t require any change on the server machine.
(current version as of 2018/01 is 1.2.1)
wget https://github.com/shadowsocks/shadowsocks-go/releases/download/1.2.1/shadowsocks-server.tar.gz
tar xf shadowsocks-server.tar.gz

# Create config.json, see example below
vim config.json

# Run programm in foreground - use tmux or screen if you want to keep it running
# only needs sudo if you choose a port < 1000
# -u starts with udp forwarding too, which is needed for DNS lookups in clients
sudo ./shadowsocks-server -u
Simplest way of configuring the server is adding a config.json file in the same folder as the binary. Here is an example:
{
  "server":       "1.2.3.4",
  "server_port":  443,
  "local_port":   1080,
  "password":     "yoursecretpassword",
  "timeout":      600,
  "method":       "aes-128-cfb"
}
- Server port: choose an unused port. The more common the port, the less likely it will be blocked. If possible, use HTTPs port 443, another option would be numbers like 995 (POP3s, if you don’t use POP mail server) or 990 (FTPs). You could also use a port number greater than 1000 to avoid using sudo, try 8443 or 8080 first. The port 8388 is kind of default port for Shadowsocks.
- method: Default recommendation by Shadowsocks website is AES-256-CFB.
But the Go-server README suggests: aes-128-cfb is recommended as it is faster and secure enough – I also use 128 to save a little battery on the mobile clients. - auth: (deprecated and omitted) Use One Time Authentication (generate a session password to avoid known plaintext attack). Should always be enabled. You could disable it on the client if you experience problems.
- password: generate a passphrase that you provide to all clients later on
Unused by the server, but can fill in if you want to share the config file with client software:
- Local port: The default is 1080 for all apps.
- Server IP: Enter the public IP of the server.
The Go server will run in the shell foreground and don’t daemonize. Use Screen or Tmux to keep it running without to much hassle. Otherwise you could create a system job (like Upstart) to wrap it. Here a gist for some ideas (using the -local instead of -server tool): https://gist.github.com/larryli/7248515
Installation on clients (Android, iOS, OSX)
I describe shortly installation and operation specifics of the Android and OSX clients. You can find a multitude of other clients on the Shadowsocks website.
Android
 For Android there is a Shadowsocks App in the Play store. If you can’t access that store from your location, you have to sideload. Fortunately, they provide the APKs on Github which is not blocked (at the moment): https://github.com/shadowsocks/shadowsocks-android/releases
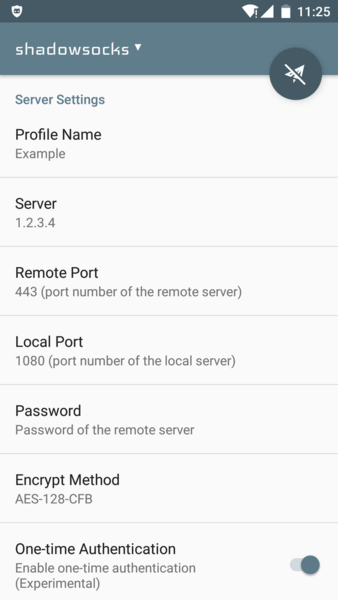
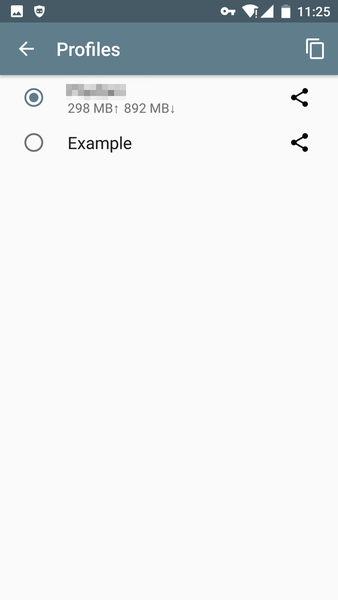
If works great with recent versions of Android, as there is no Root required to enable a global Proxy service for the whole device. (There is only a bug with the profile manager, make sure to choose the Default profile and rename it, otherwise you might lose the settings later). Make sure to disable “One-Time Authentication”, which is already deprecated. Also enable UDP forwarding, so DNS resolving of forbidden hostnames work and you will receive untainted name resolution.
iOS
Use the app from the iOS AppStore. Configuration is similar as android.
OSX - ShadowsocksX-NG
Currently, there are two options, ShadowsocksX and ShadowsocksX-NG. I would recommend ShadowsocksX-NG, which is a rewrite of the former and has more features, like a built-in http proxy, that is required by apps like Google Drive. The rest of the guide will assume you are using ShadowsocksX-NG.
Installation: Download via brew cask (brew cask install shadowsocksx-ng) or download manually from Github:shadowsocks/ShadowsocksX-NG.
Enter the settings from your server here. Make sure to NOT enable OTA. I recommend to enable the HTTP Proxy, too, which comes in handy when working with CLI apps or some apps, like Google Drive.
After the app is running, you should already have access to all the websites via Chrome, Safari etc.
If Firefox doesn’t work, go into FF settings -> network proxy -> Manual proxy and enter SOCKS Proxy “localhost”, with port 1080.
Google Drive, CLI programs, etc. - SOCKS to HTTP proxy
Some applications ignore our newly configured SOCKS proxy and require a HTTP proxy, such as Google Cloud SDK (gcloud), npm, gcloud, aws etc.
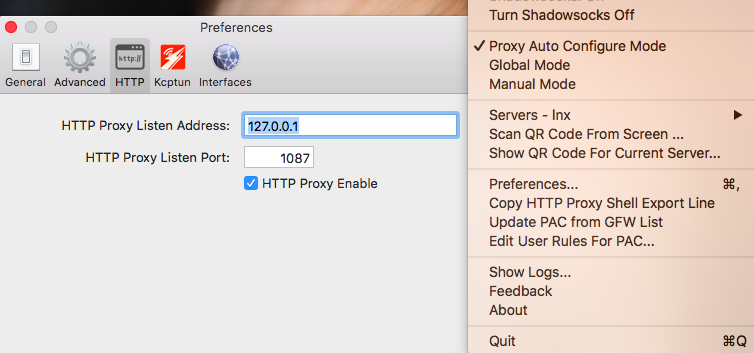
Fortunately, ShadowsocksX-NG includes the required HTTP Proxy. But you need to tell the shell programm via an environment. Just use the “Copy HTTP ProxyShell Export Line” from the SS menu, and just paste this into the terminal you are using:
export http_proxy=http://127.0.0.1:1087;export https_proxy=http://127.0.0.1:1087;
Google Drive / Backup and Sync
Unfortunately, there is an issue right now with Shadowsocks-NG + HTTP Proxy (also). After switching modes (Global -> Auto/Manual) the Web Proxy setting ist missing from the OSX network proxy settings. To use Google Drive switch to “Manual” mode and enter the “web proxy” and “secure web proxy” settings into the proxy panel in the network settings:
http://127.0.0.1 Port 1087
Happy hacking!